🕹️ More Than a Machine: Building Memories at 88mph 🚀
They say the best way to predict the future is to create it. Well, previous 2/3 weekends, my son and I decided to build a piece of the past, powered by the tech of today.
The Spark 💡
I’ve always wanted to share the magic of the arcade with my son, but I didn’t want to just buy a box. I wanted us to build something together — to feel the sawdust, wire the buttons, and see a project come to life from scratch.
Inspired by the Holbrook Tech design, we cleared the garage and got to work.
Modern Soul, Vintage Heart 🧠
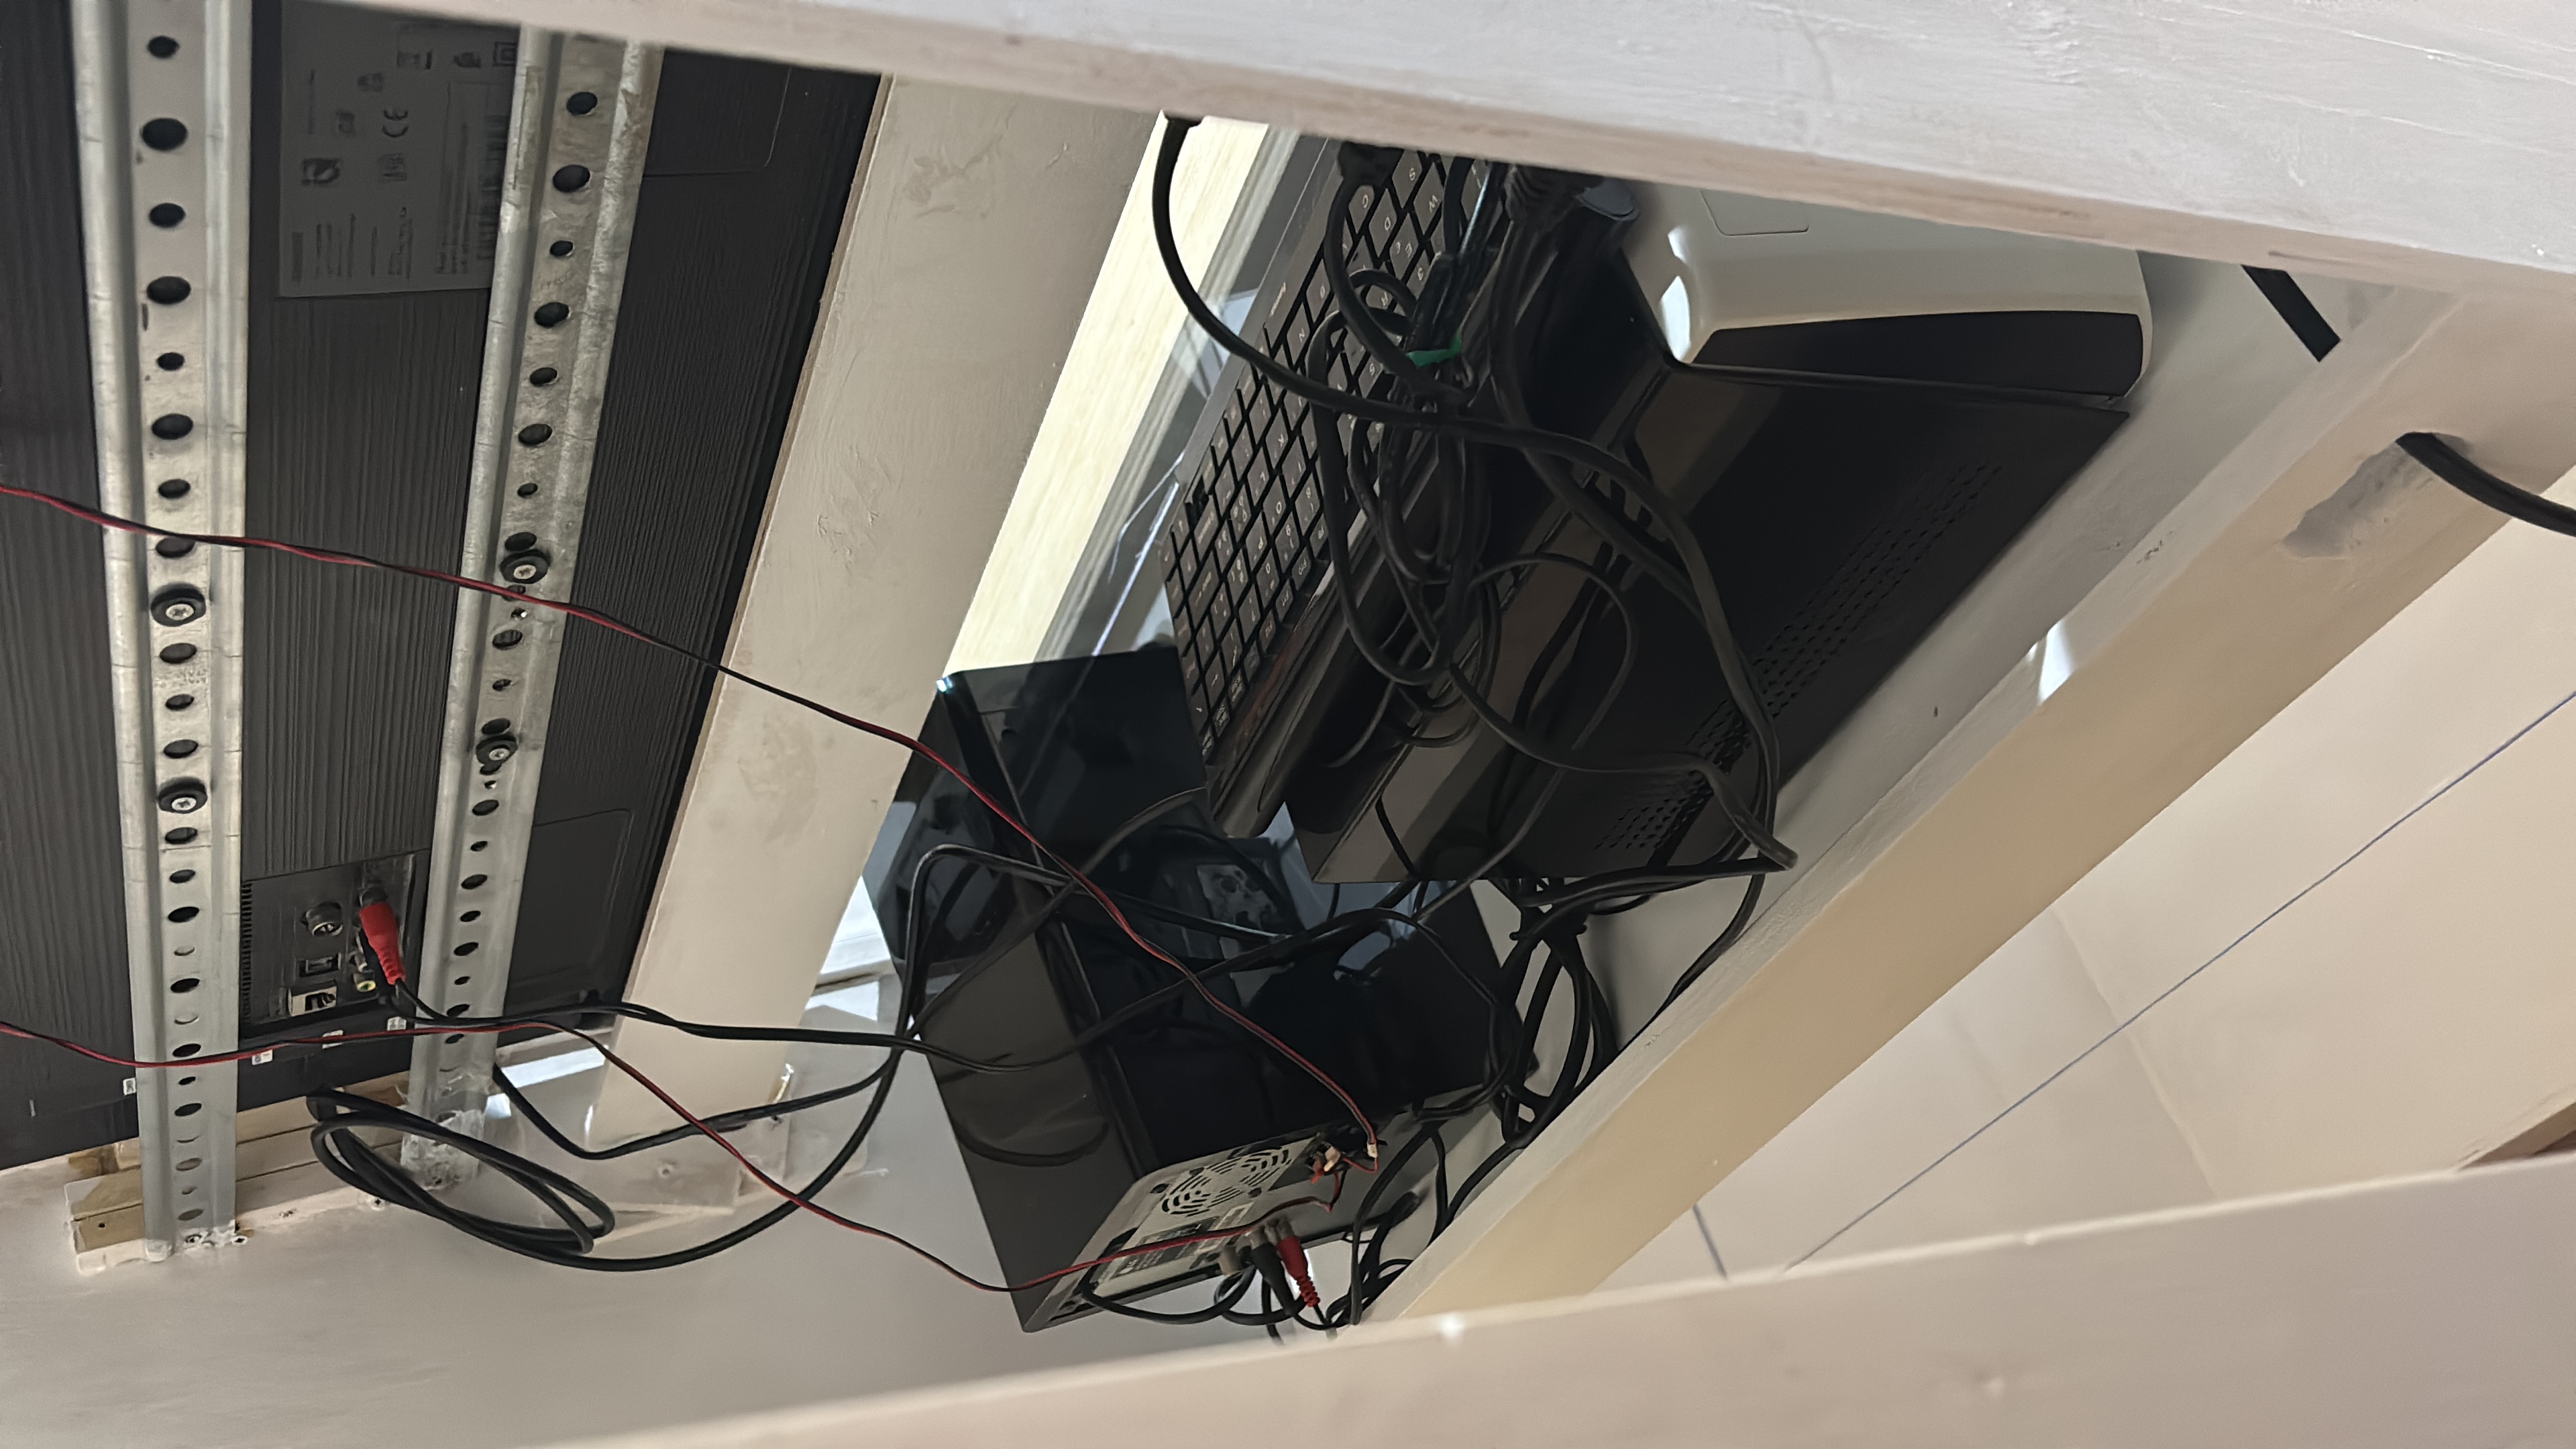
We didn’t need a massive budget to make it happen. We looked around our home and found everything we needed to give this cabinet a “brain.”
What we used:
| Component | What We Chose | Why |
|---|---|---|
| Brain | Old Mini PC running Batocera | Gave new life to forgotten hardware |
| Display | Smart TV | Crystal-clear, modern high-def look |
| Audio | Repurposed stereo system | Every “Kamehameha” sounds exactly like it should |
The result? A vintage arcade cabinet with modern reliability — and zero waste.
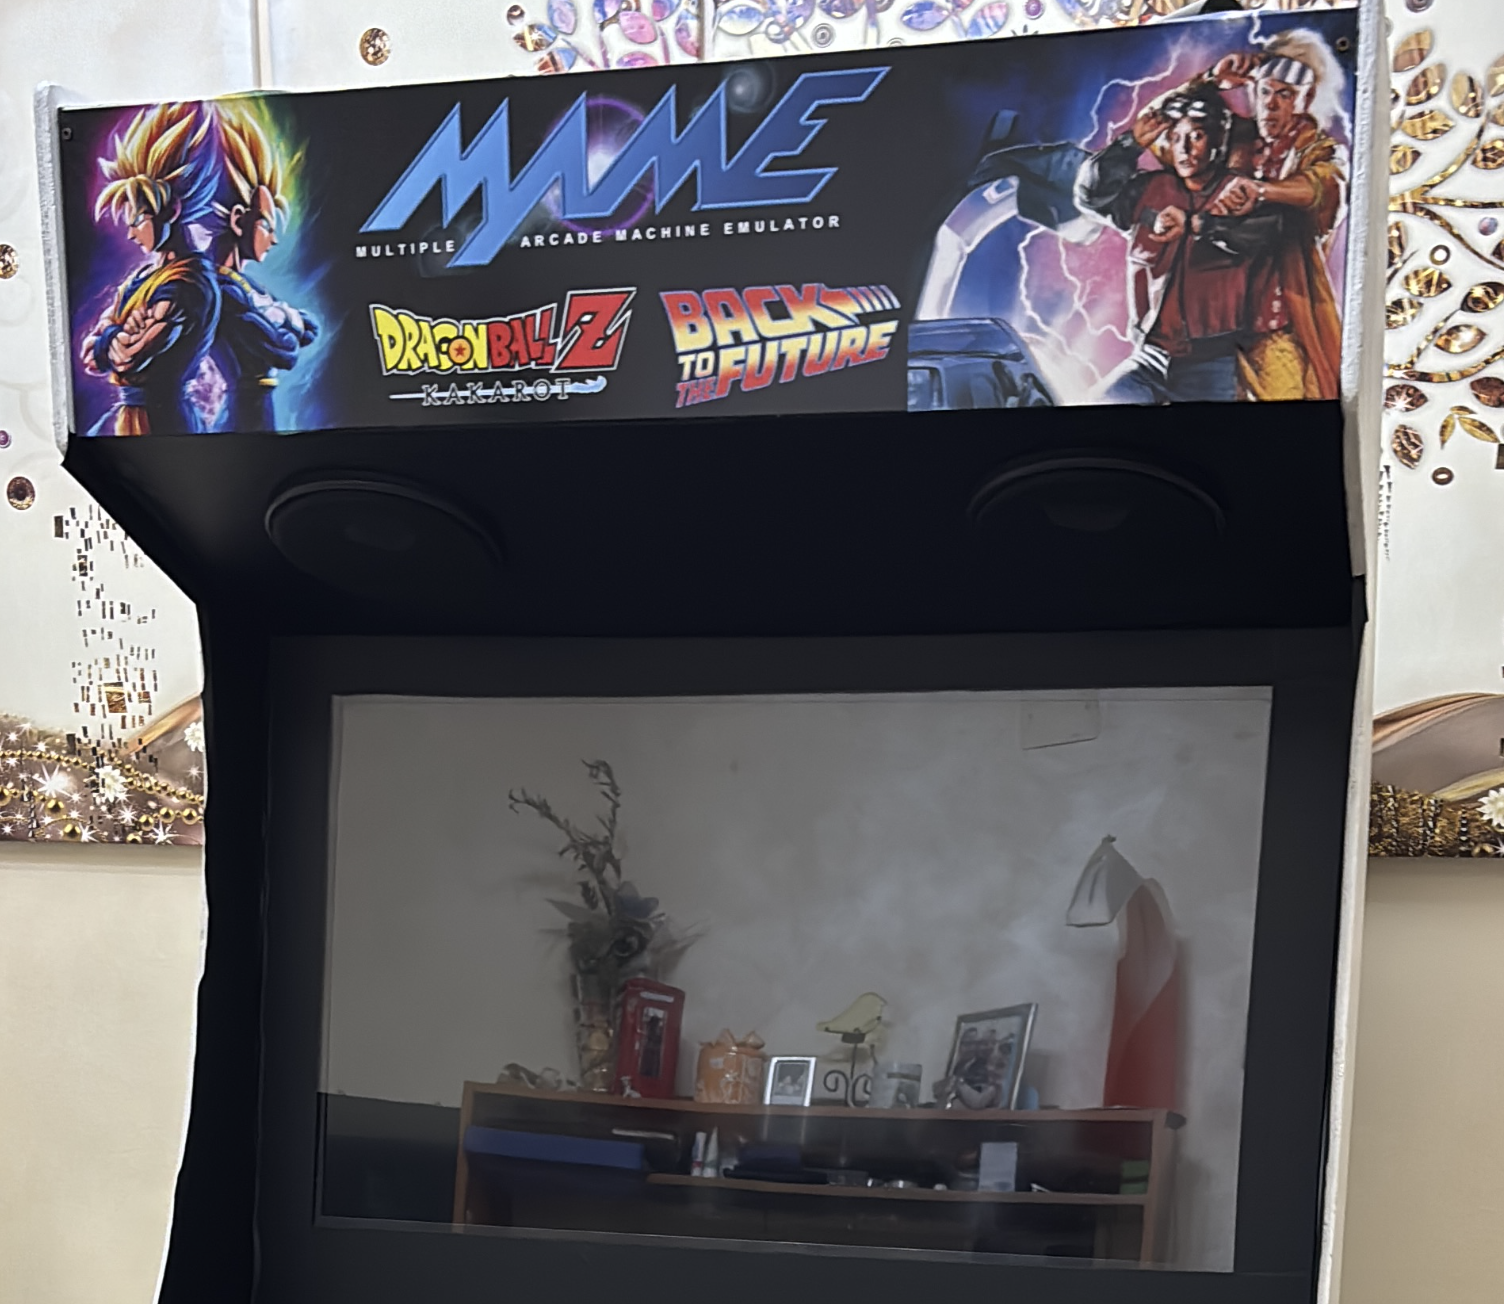
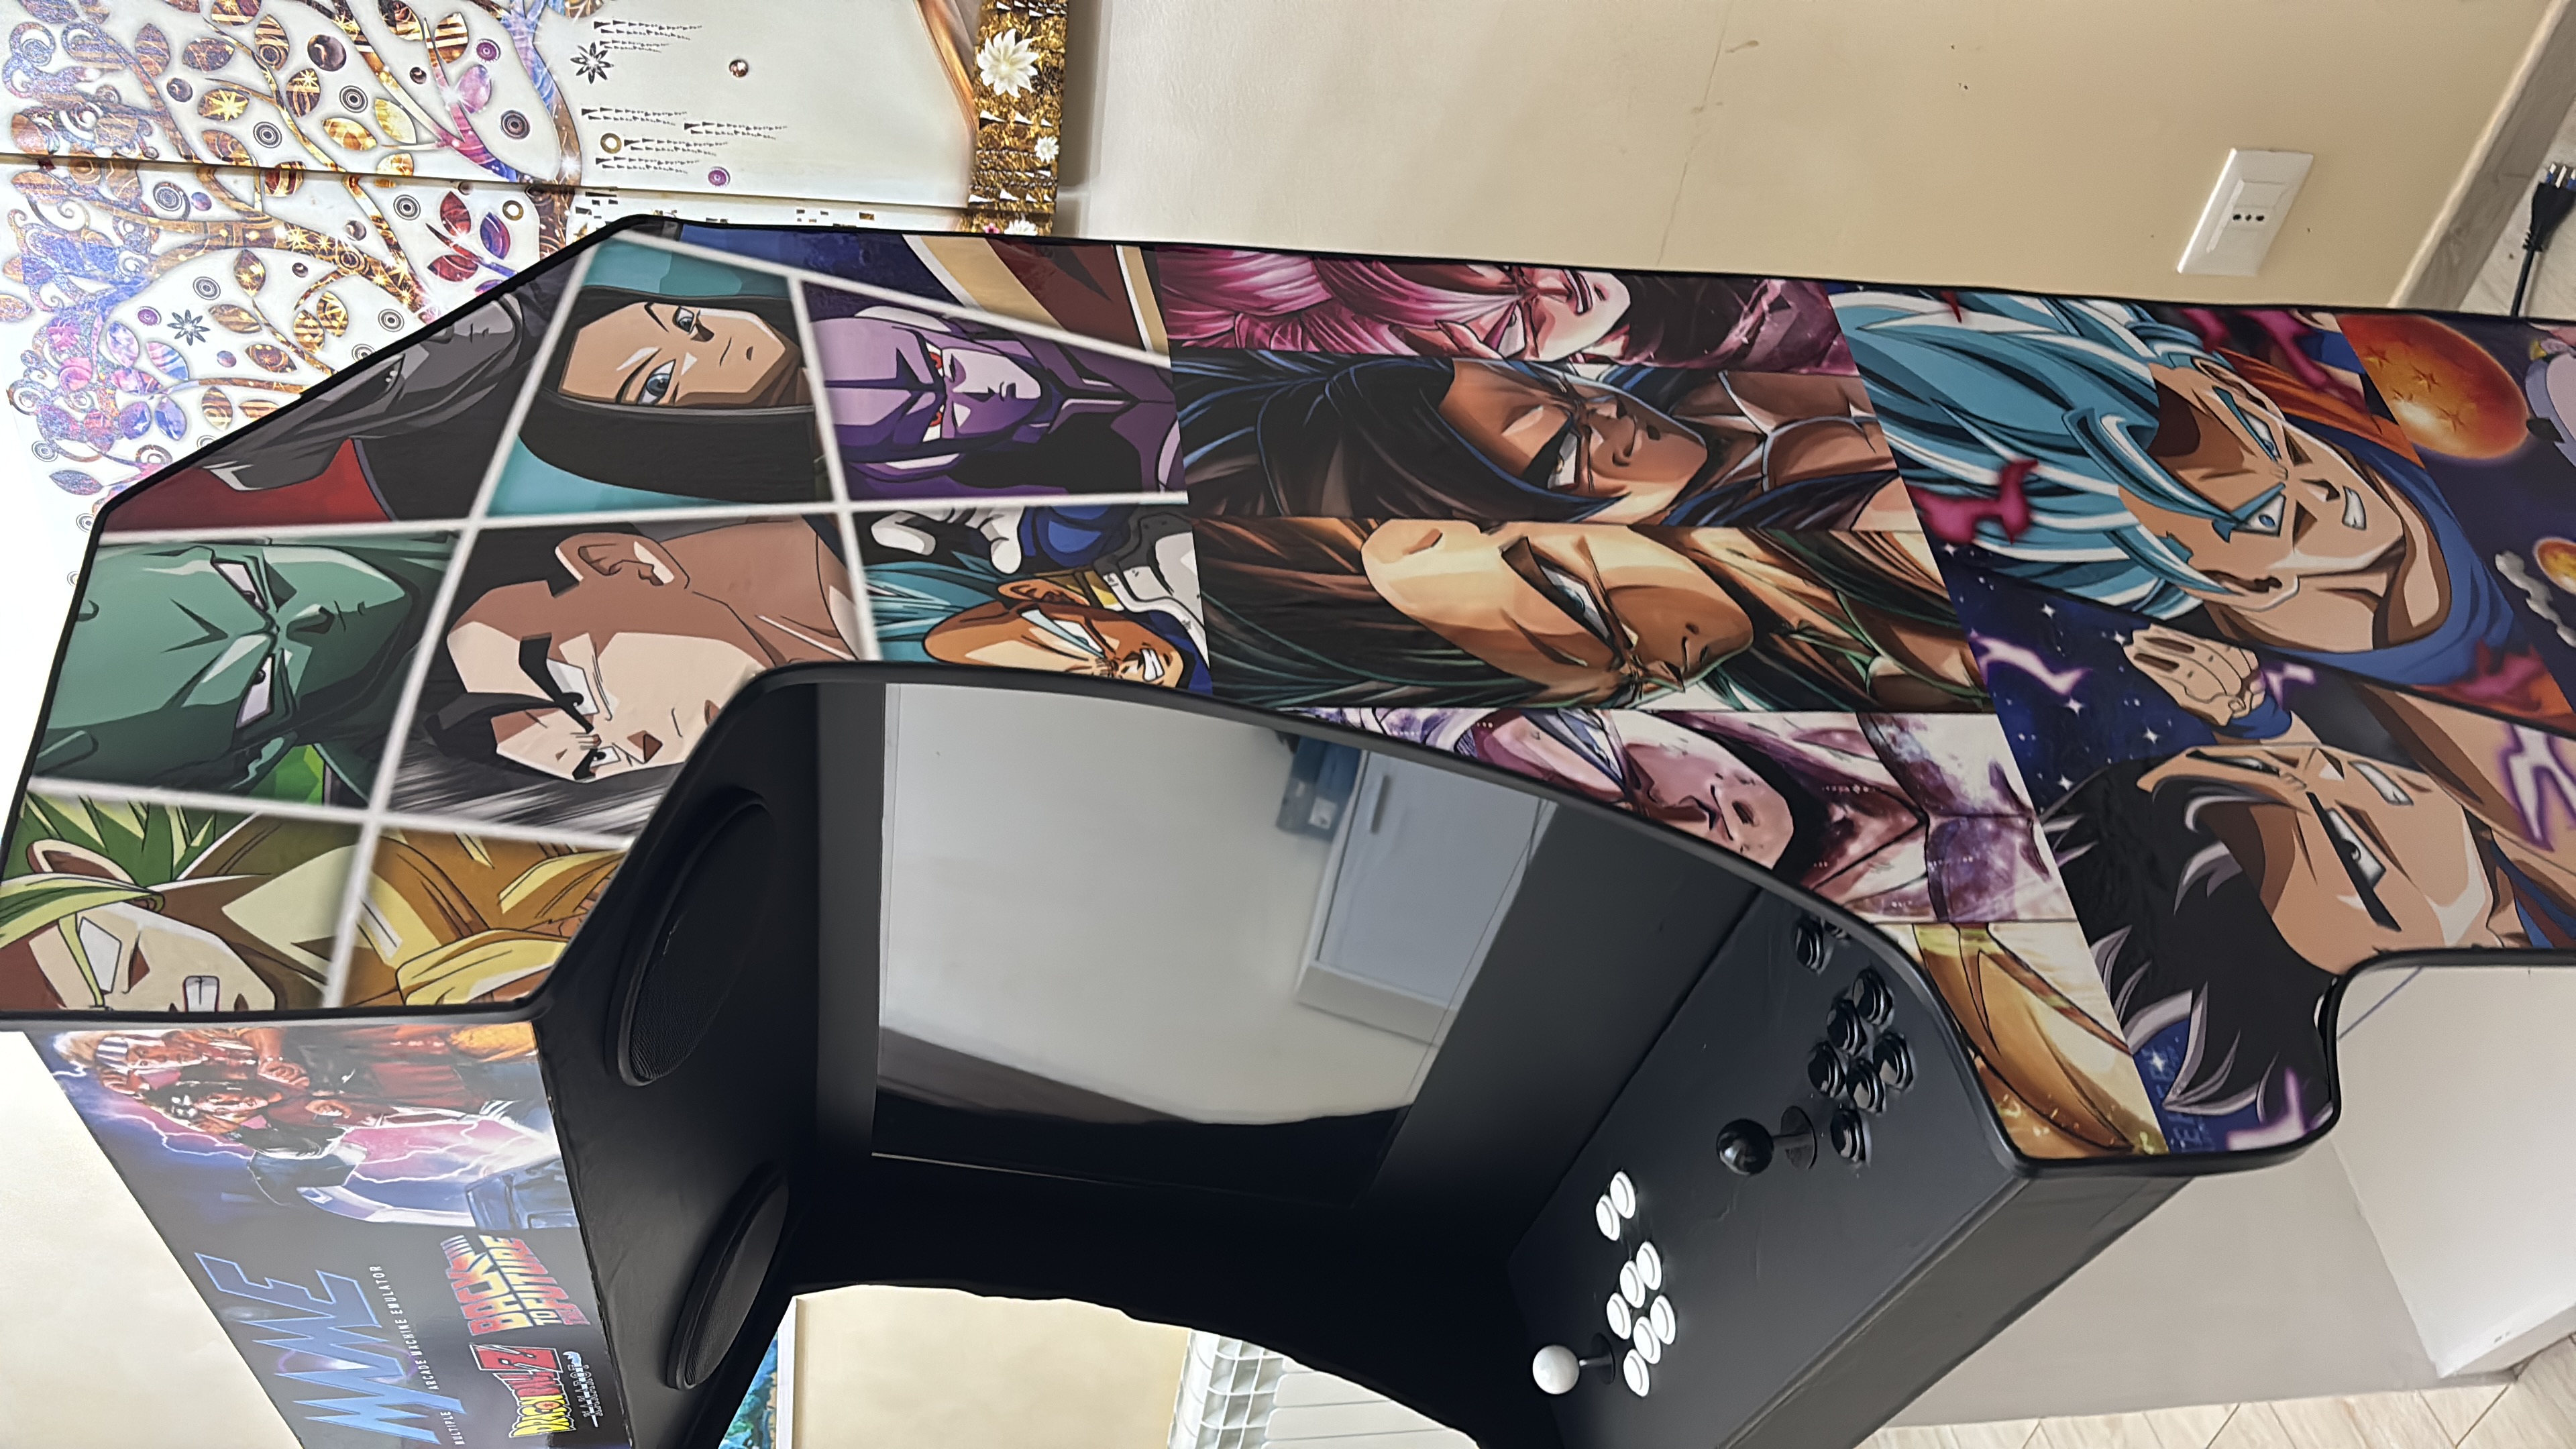
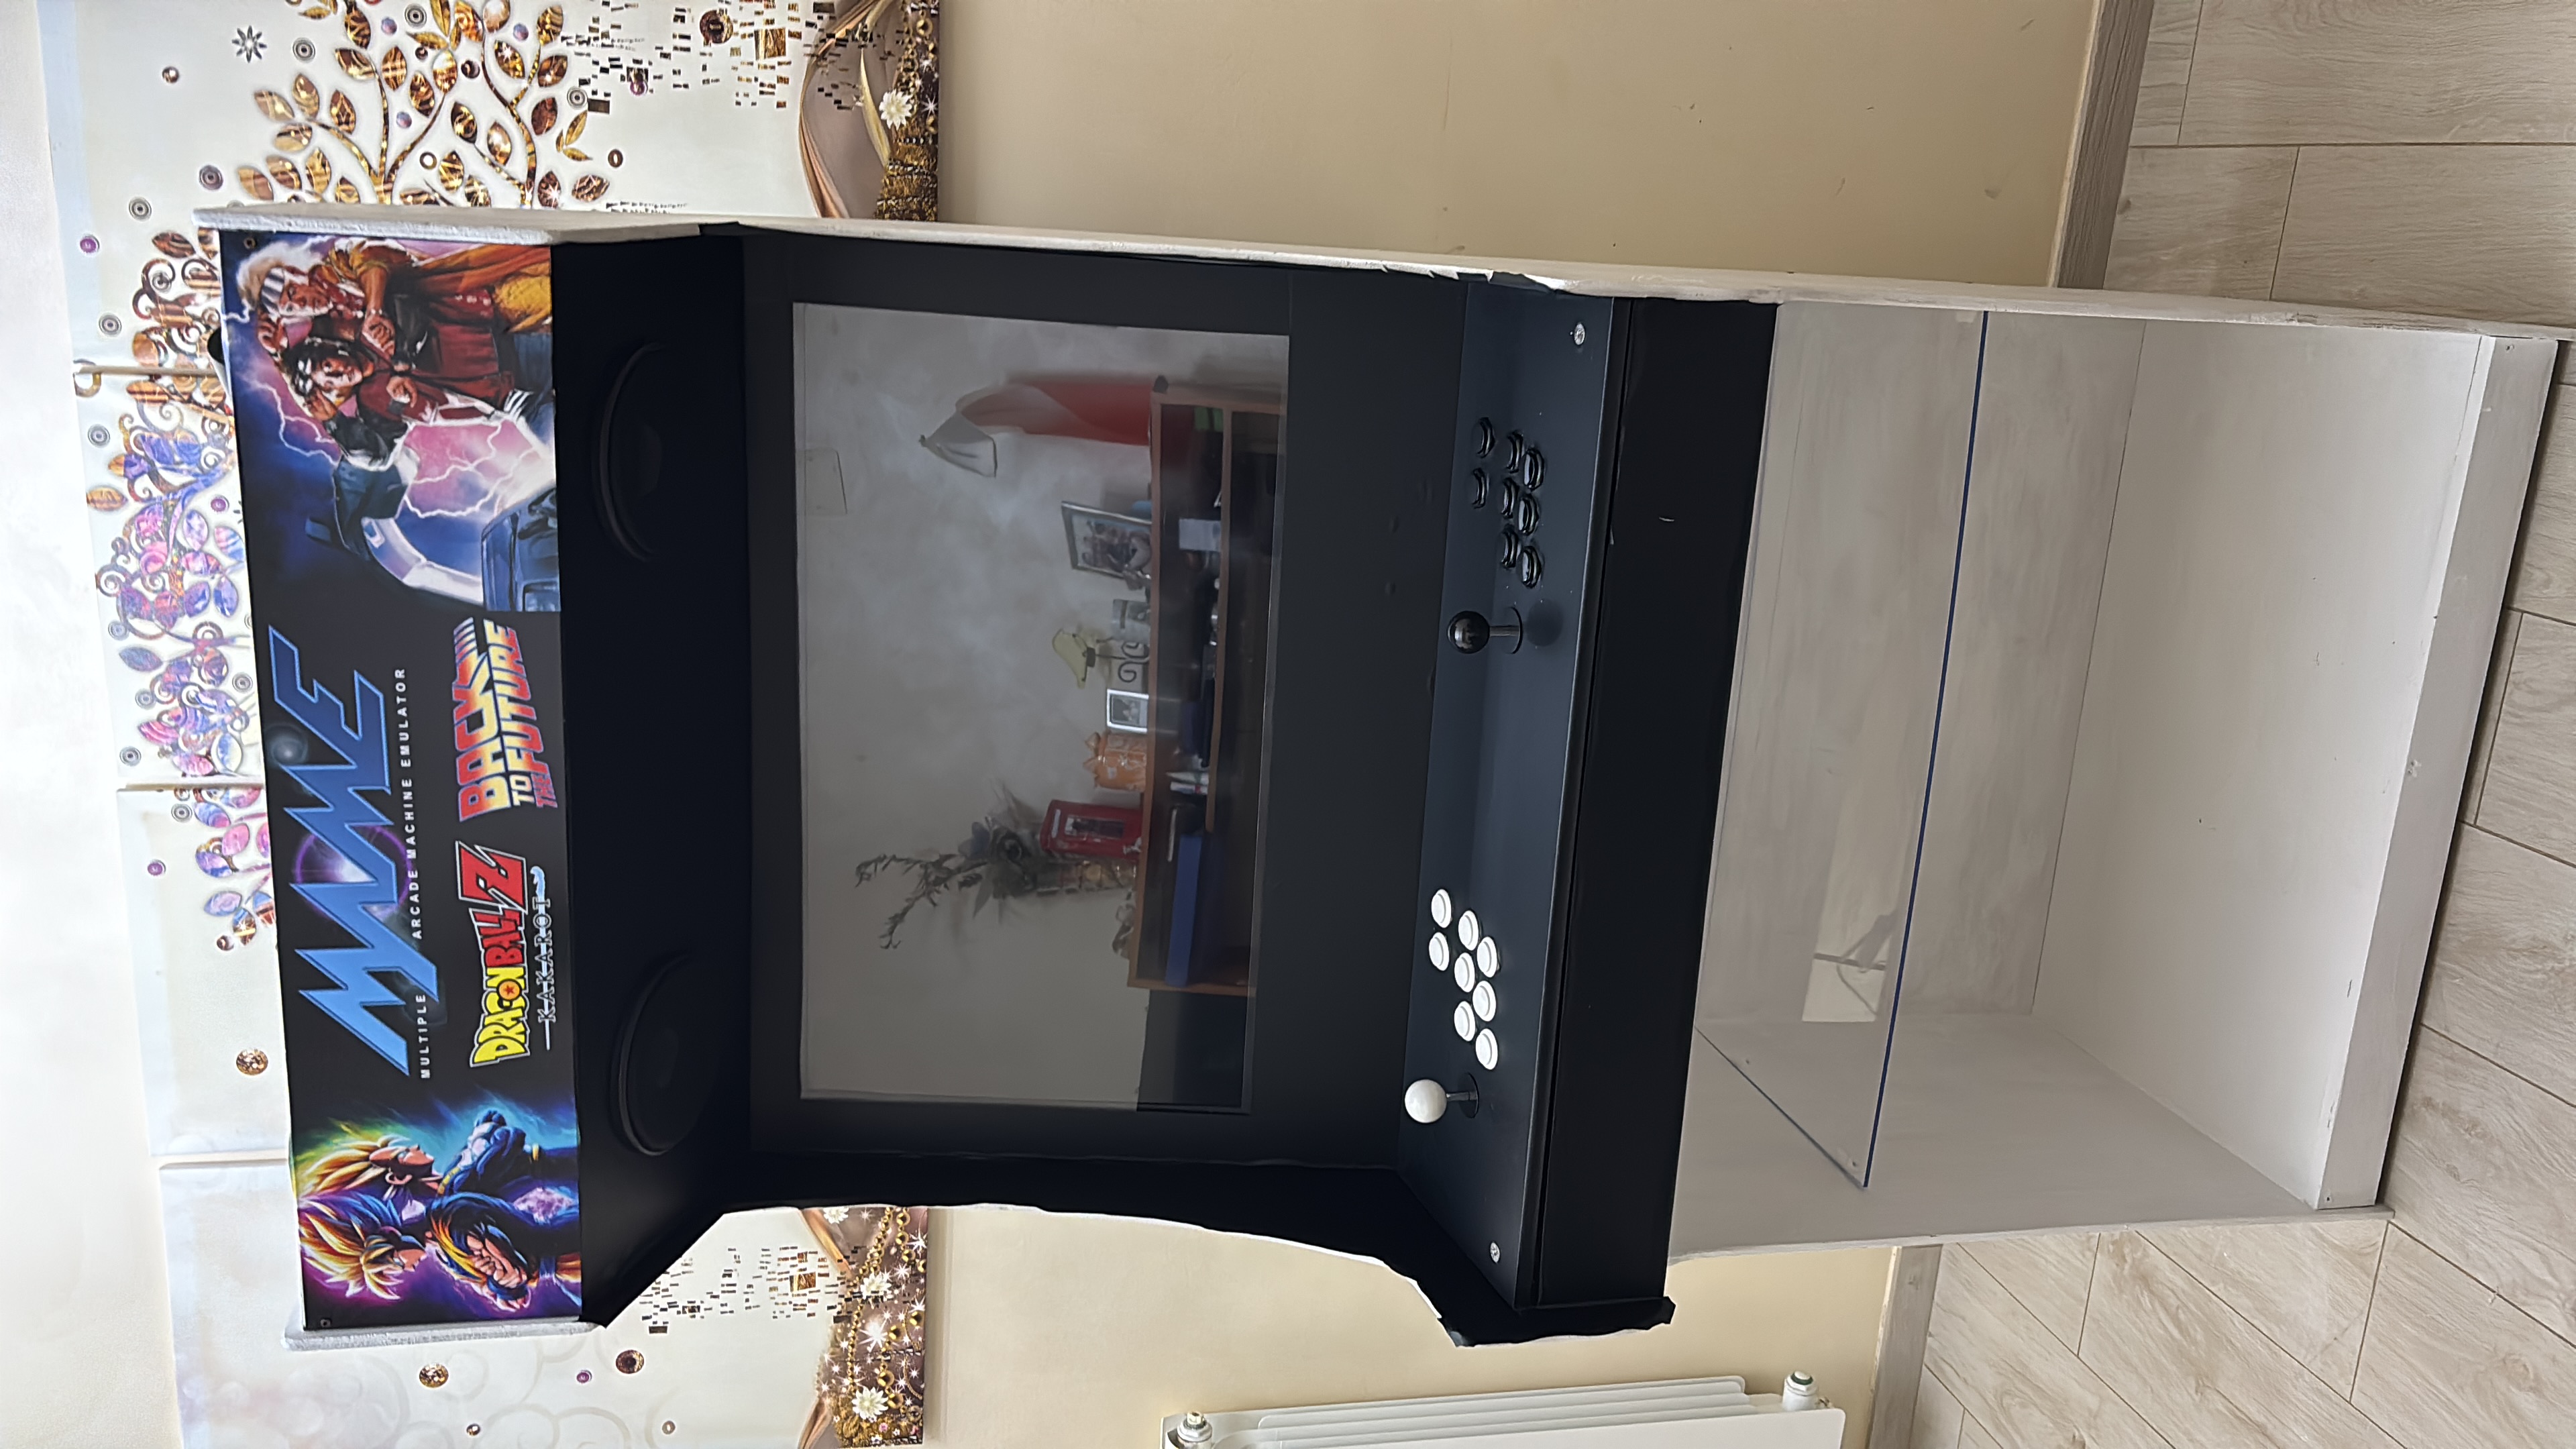
The Fusion: Dragon Ball x BTTF ⚡🐉
This cabinet is a true map of our personalities.
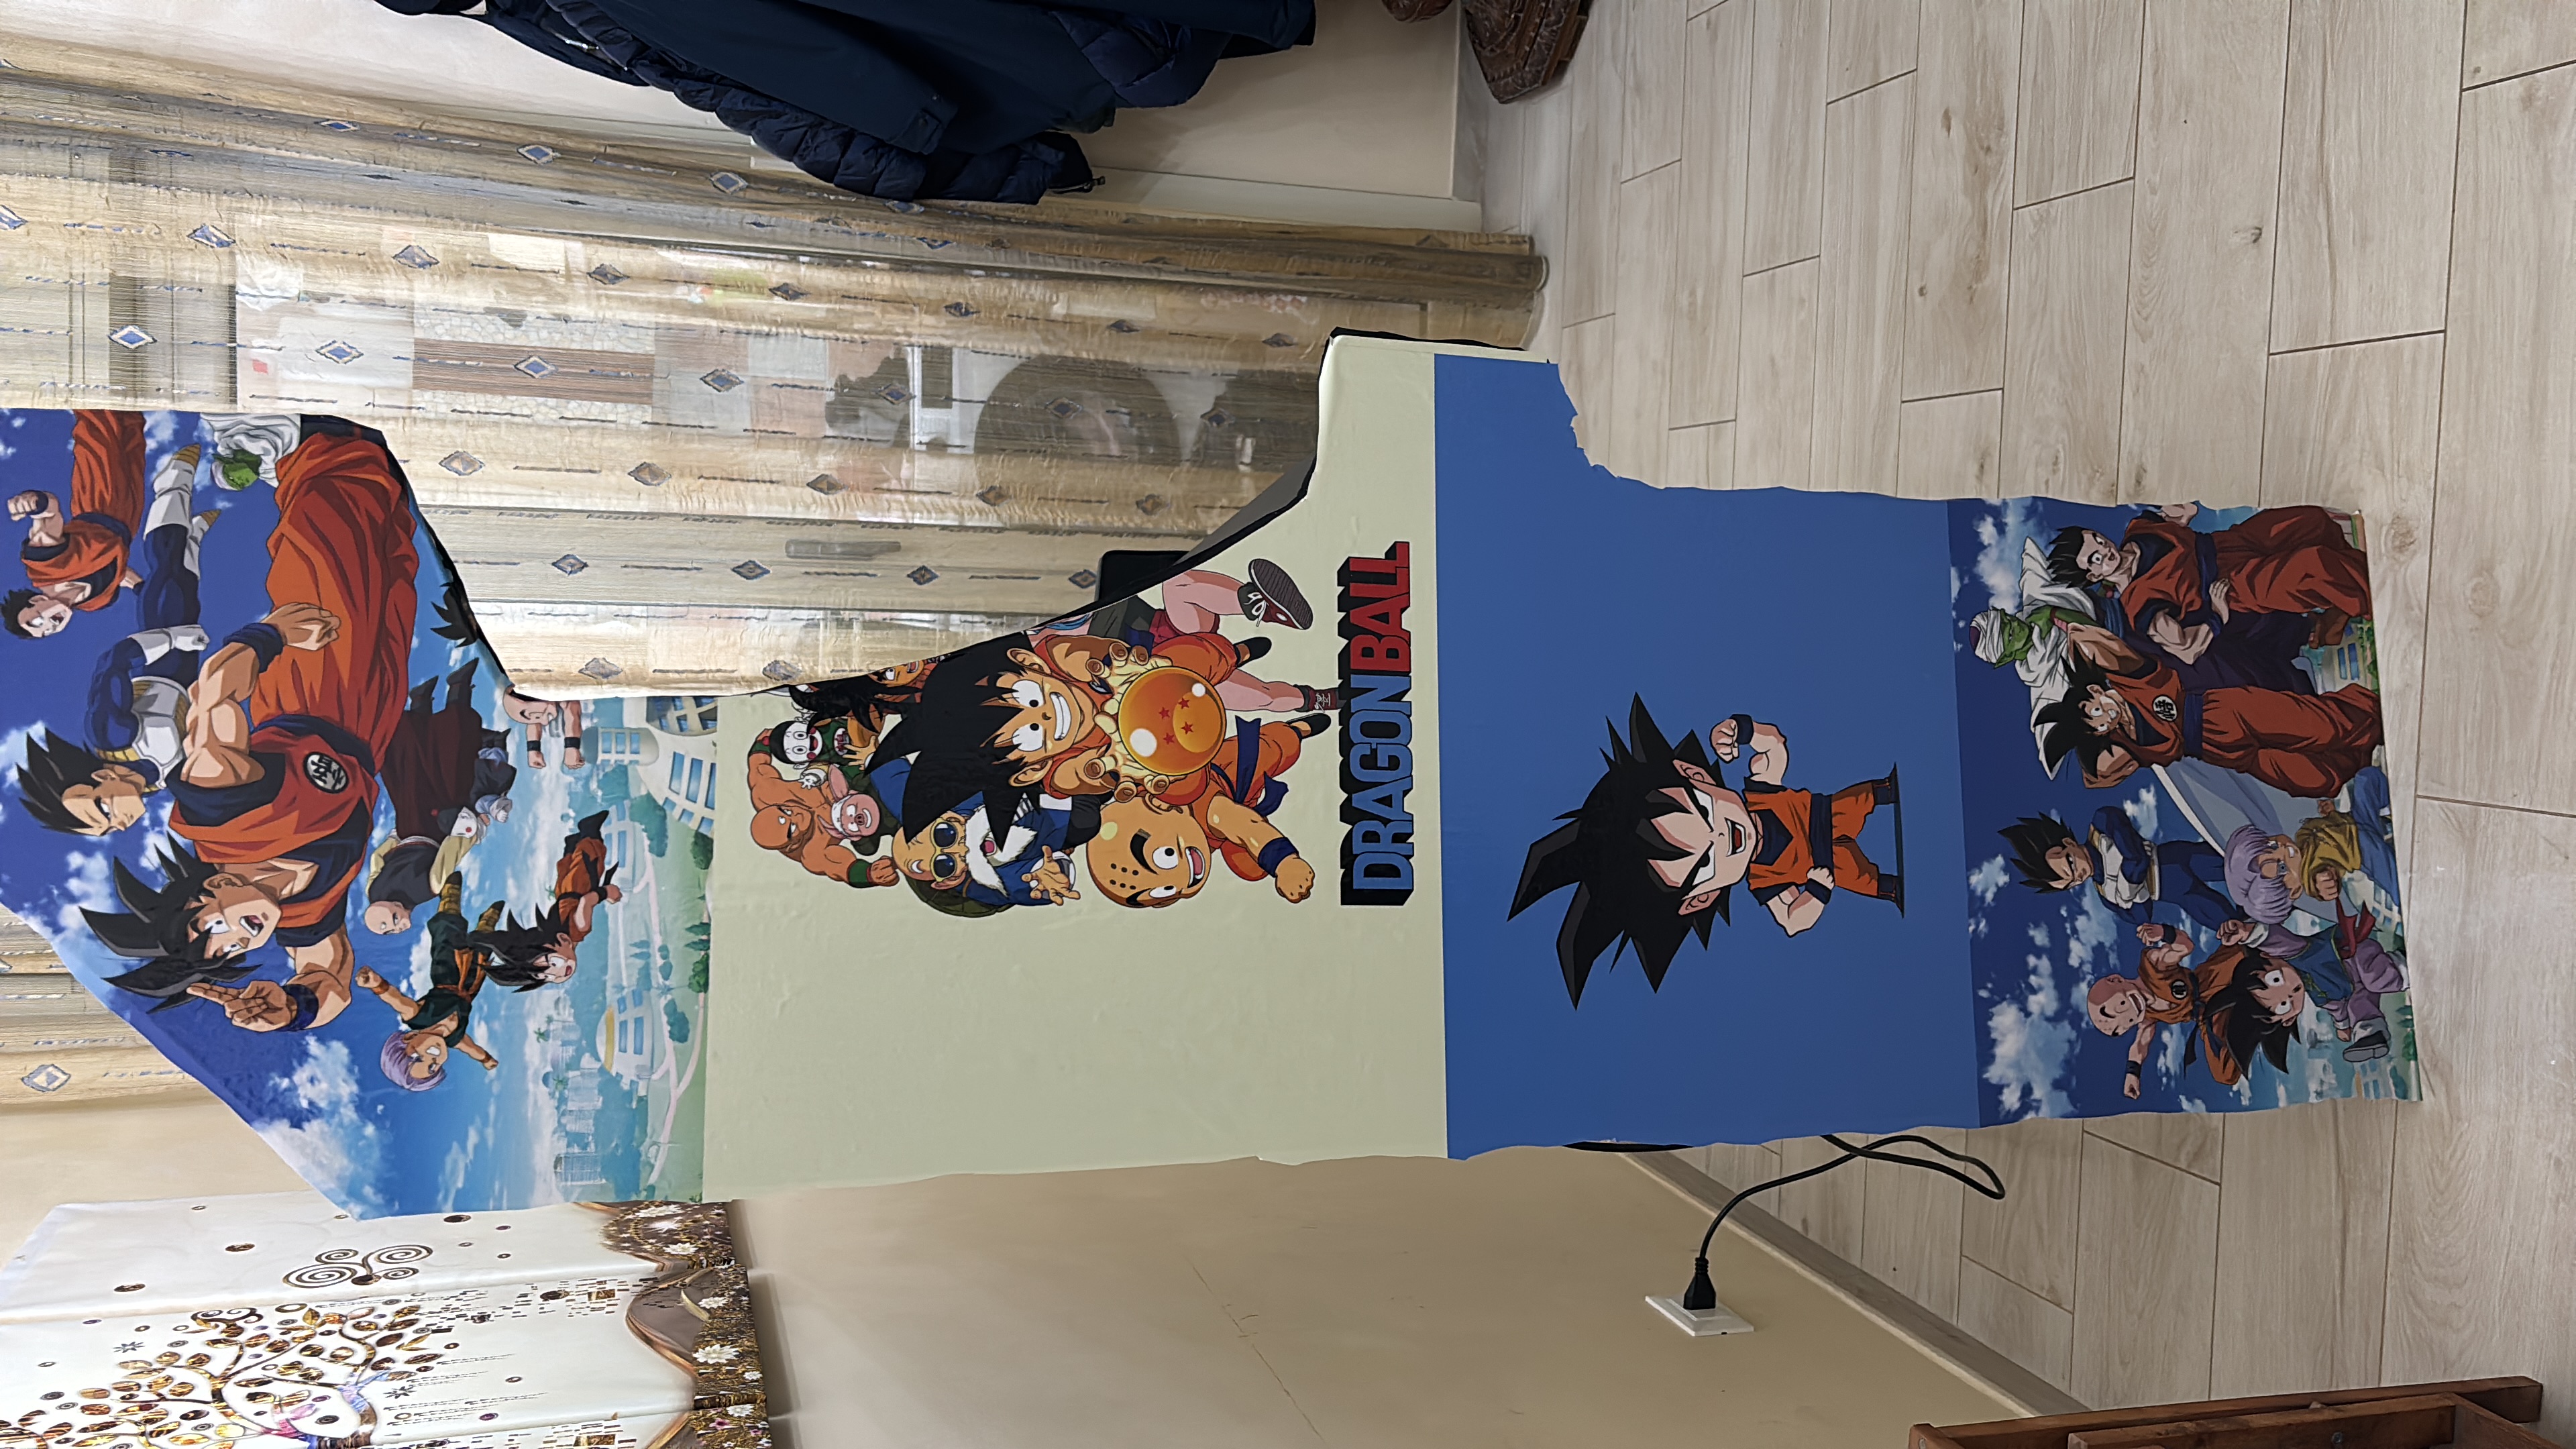
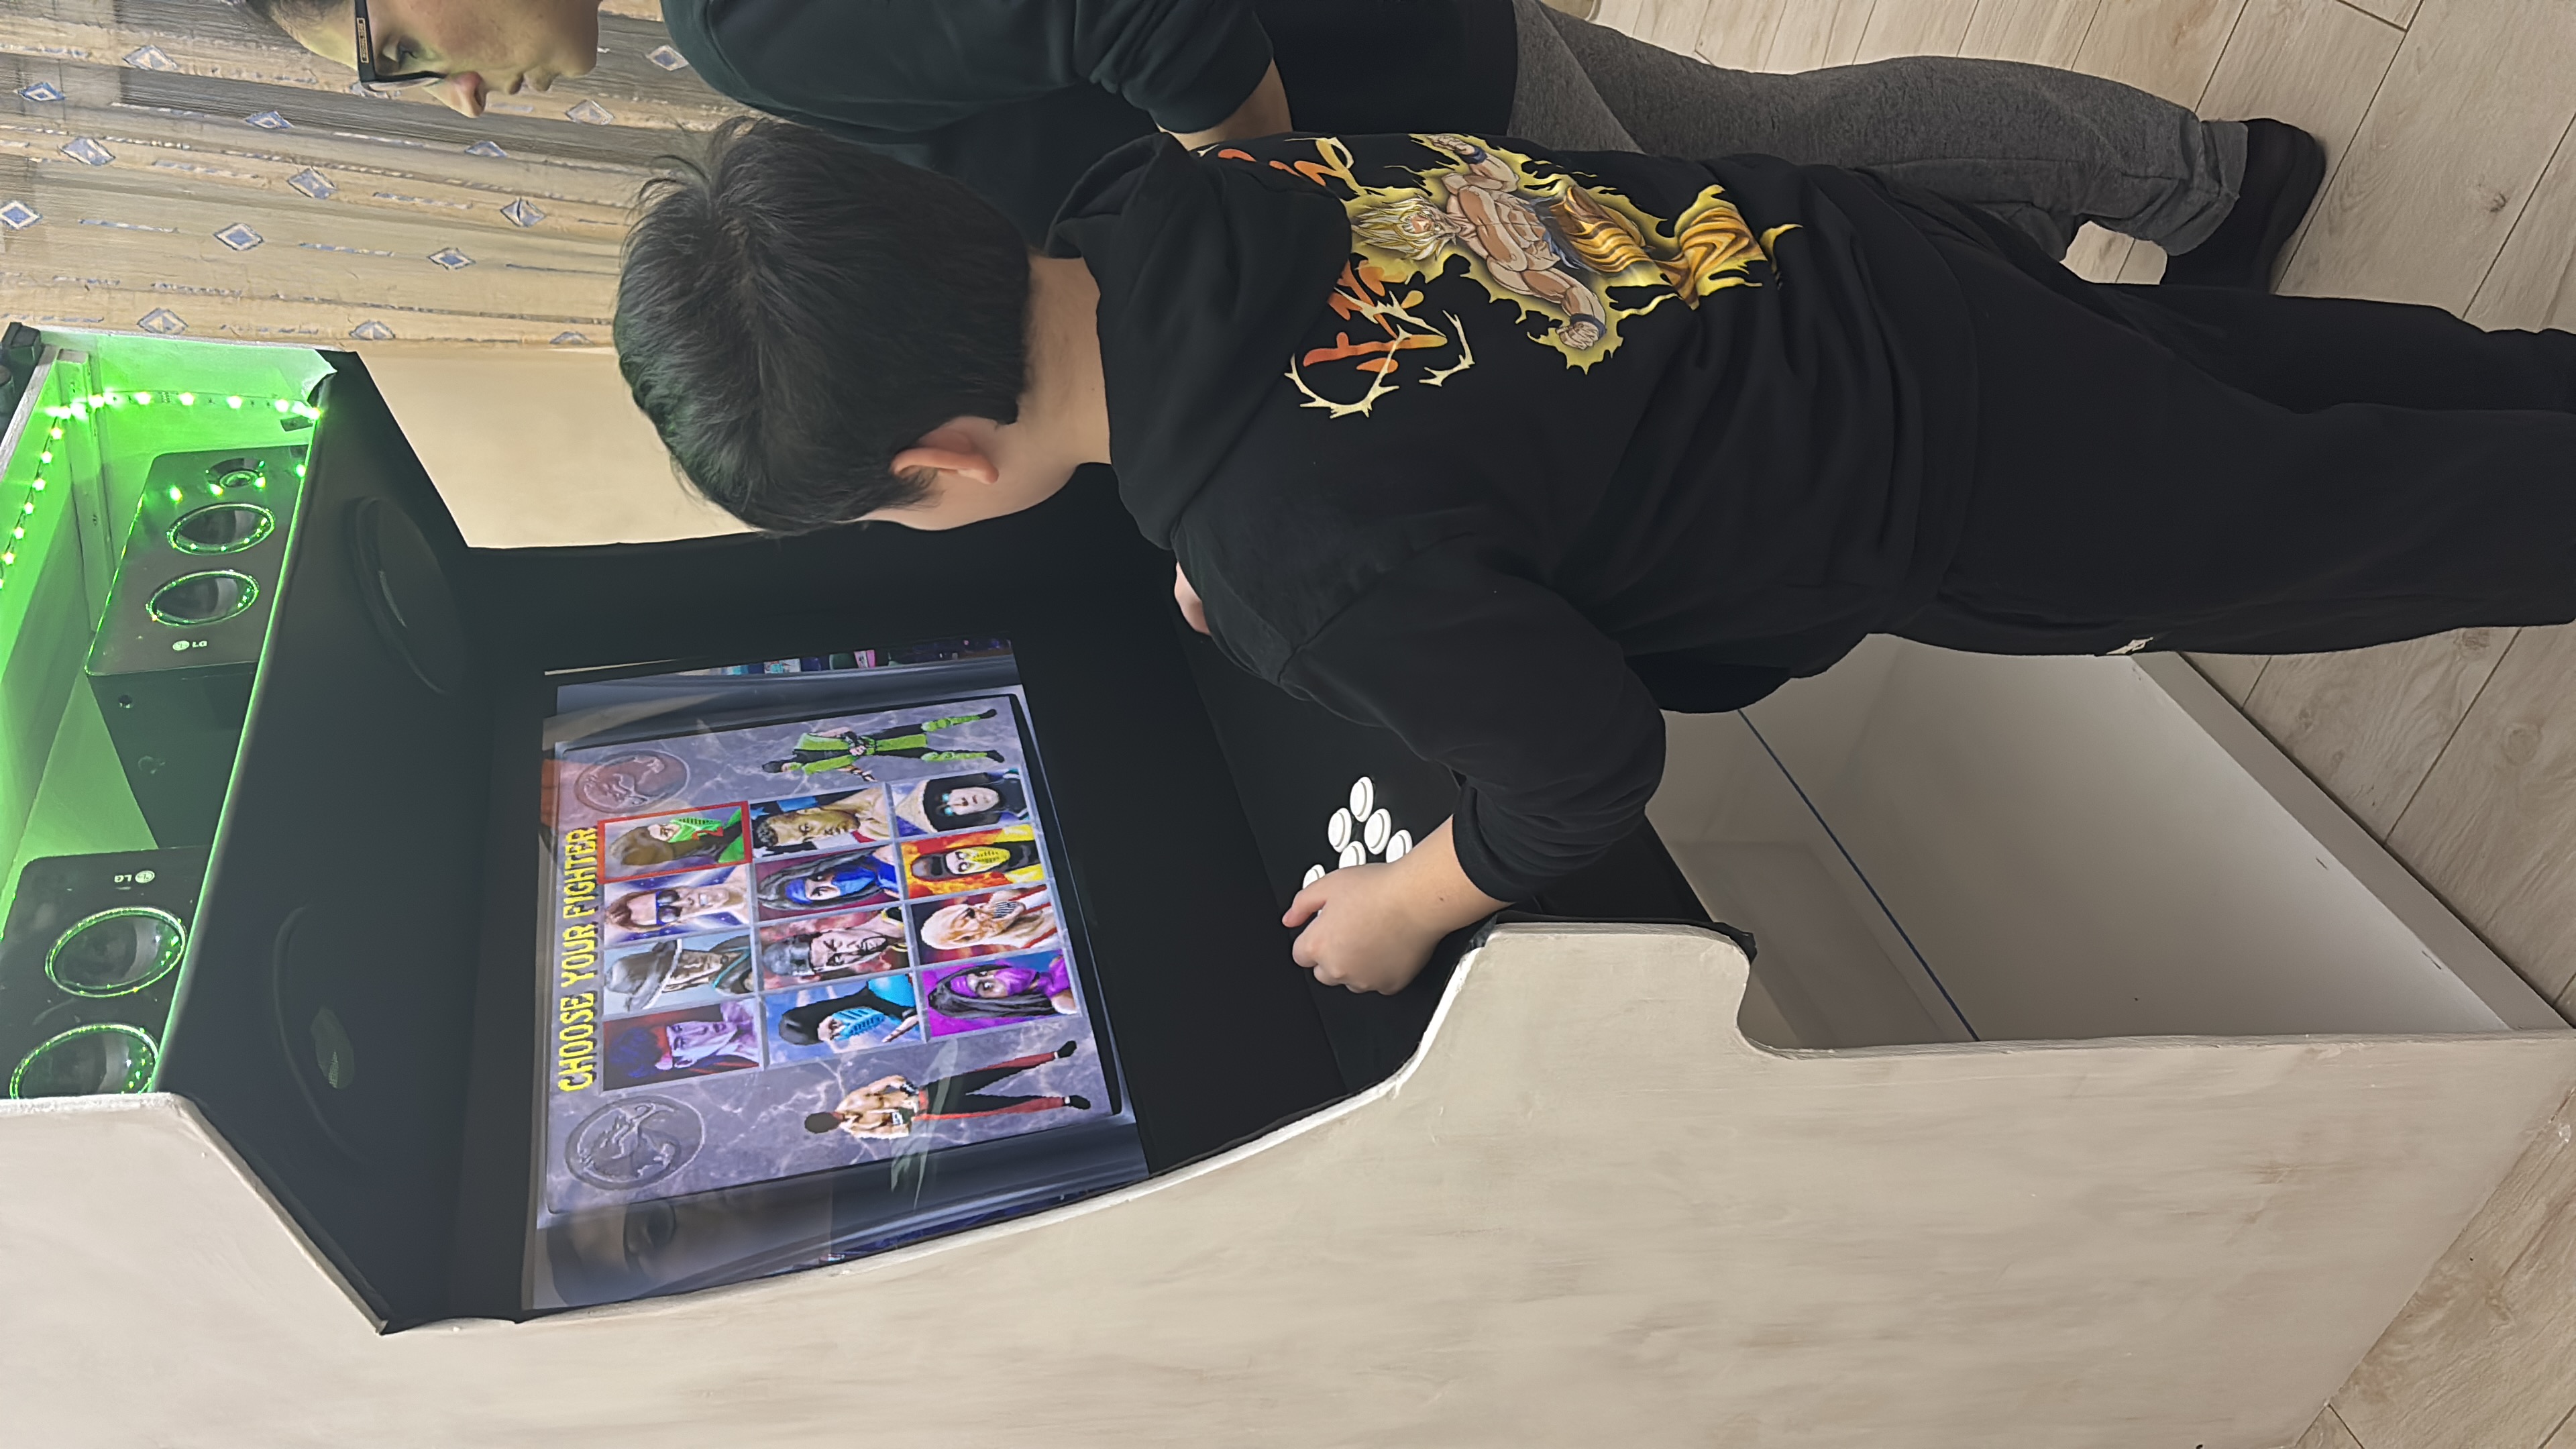
My son’s contribution: The Dragon Ball theme for the control deck. It looks incredible with those premium Sanwa JLF-TP-8YT joysticks and responsive Sanwa buttons. Every fight feels authentic.
My contribution: Since I’m the one who grew up wanting a DeLorean, I had to add my own touch. Hidden among the Saiyans, you’ll find Marty McFly and Doc Brown ready for a time-traveling adventure.
It’s a mashup of our two worlds, joined together by joysticks and adapters.
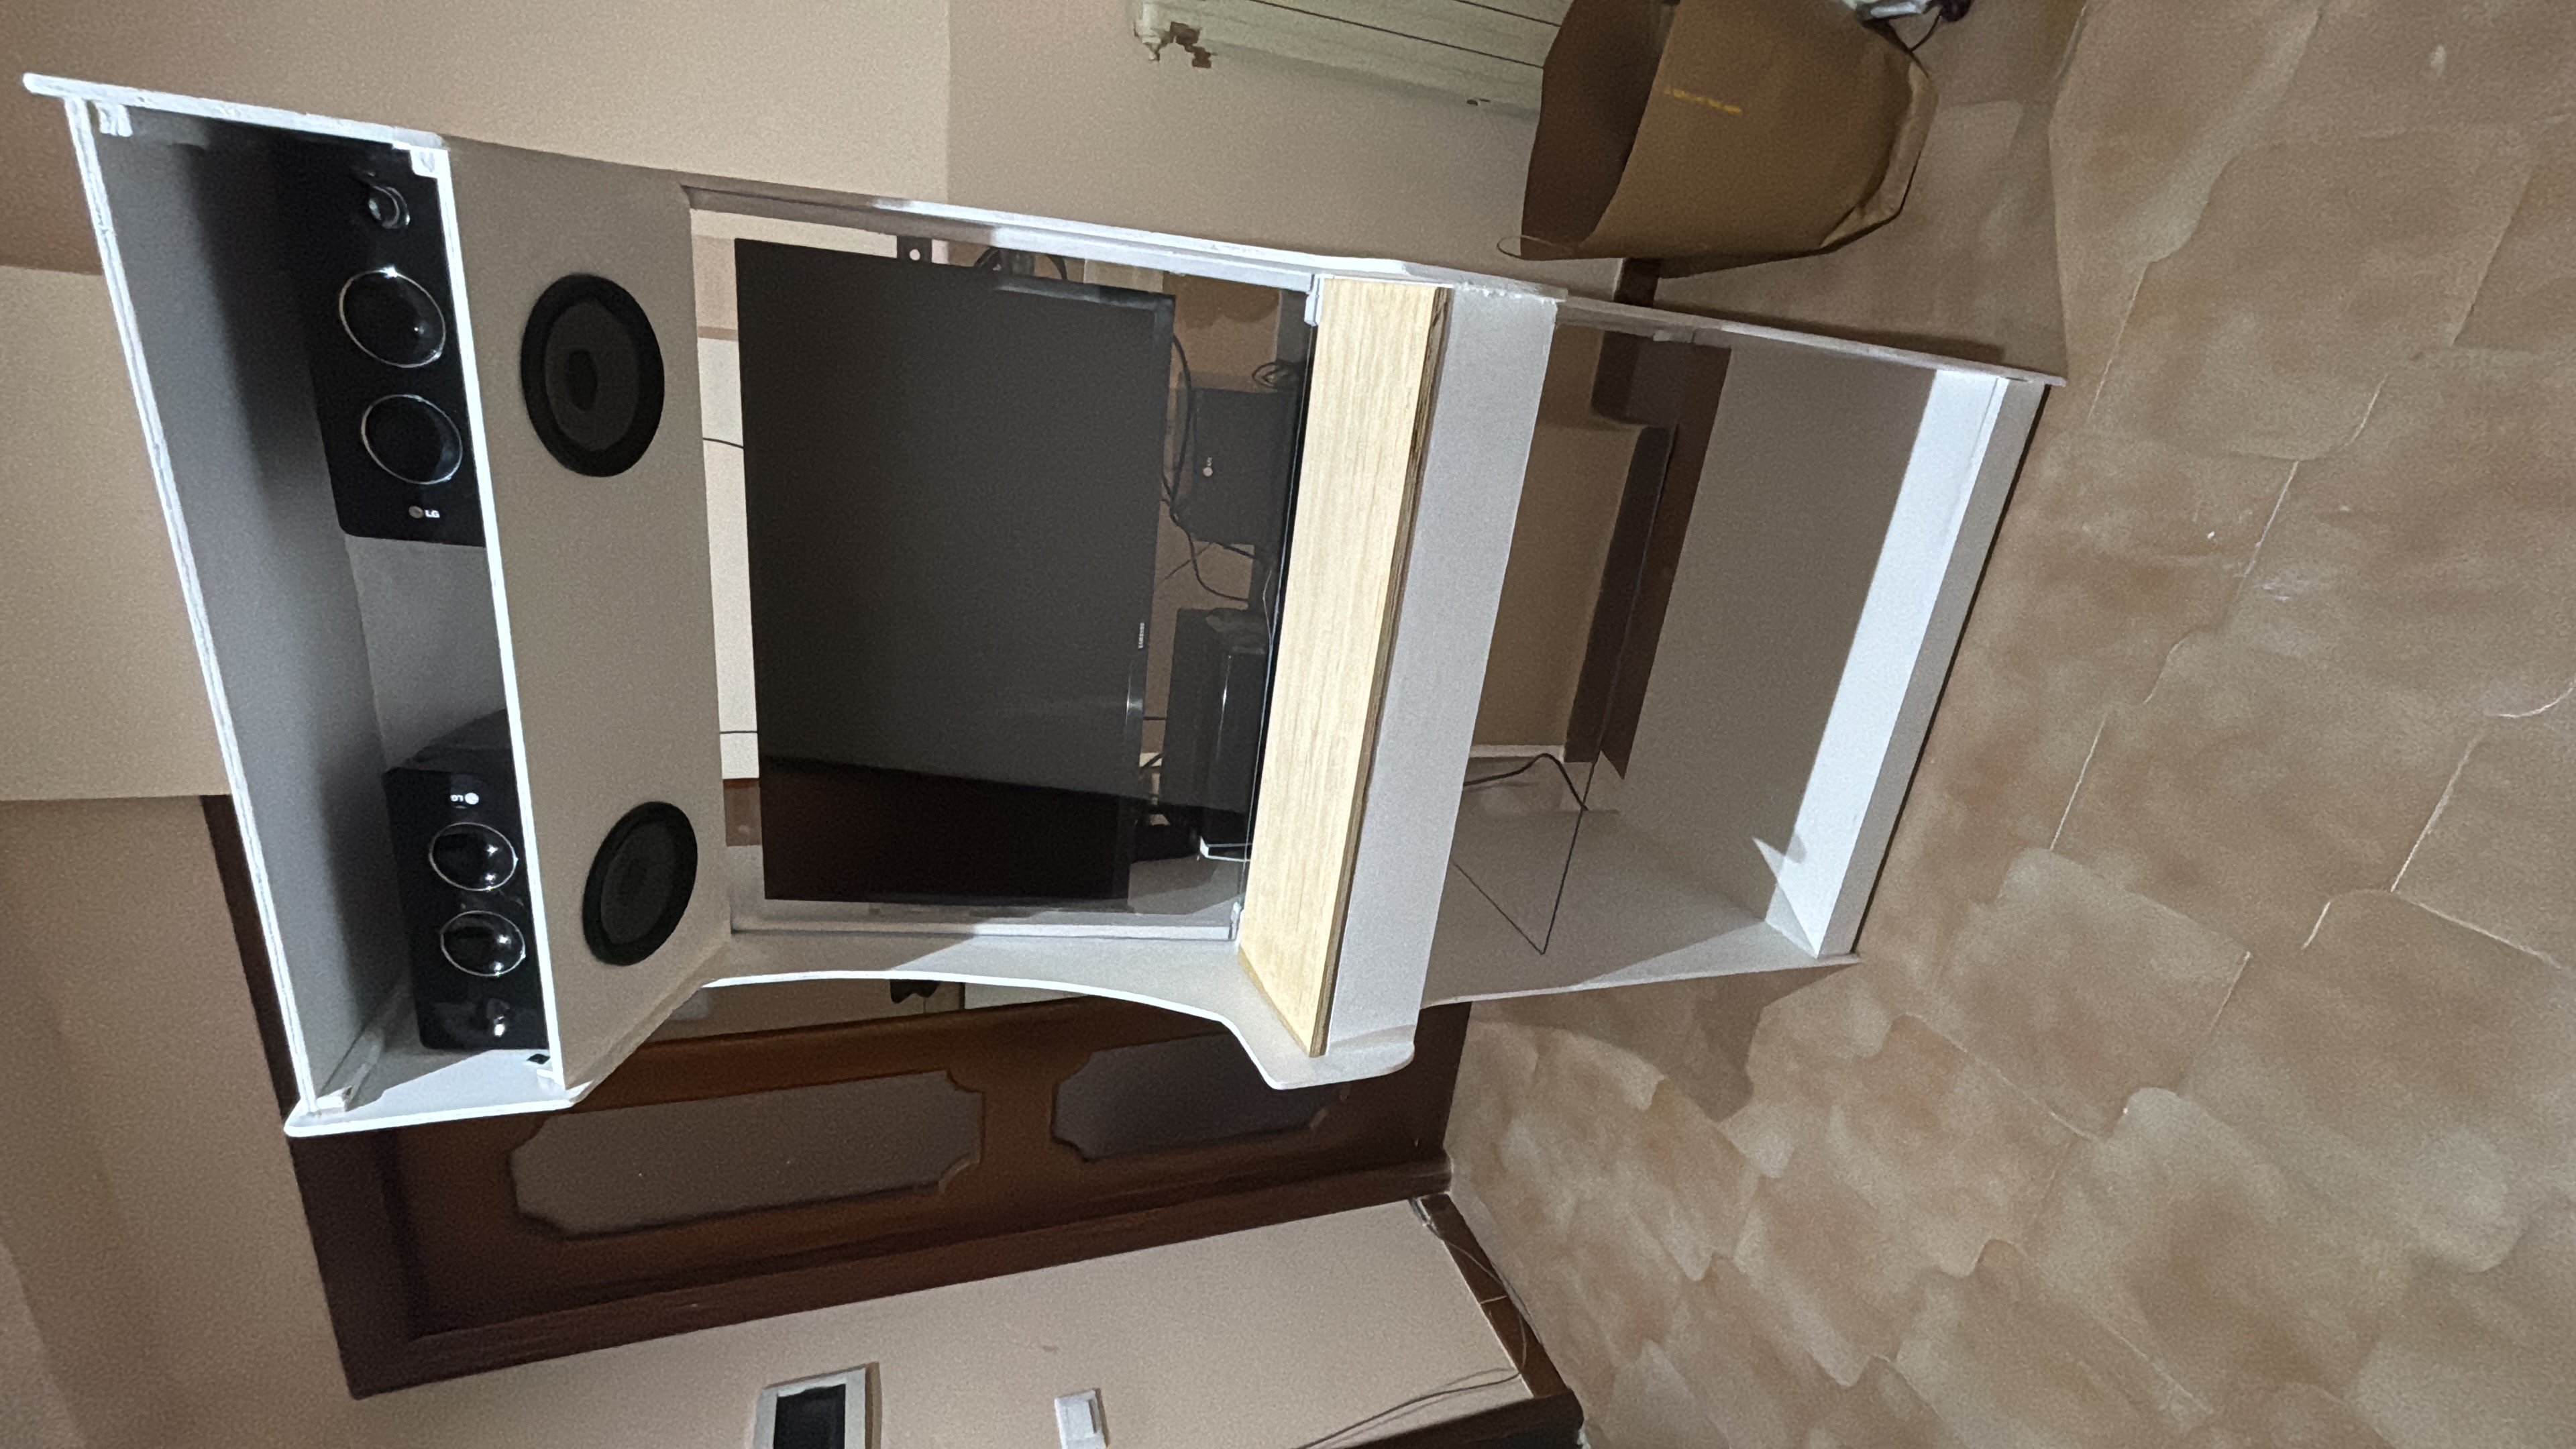
The Build Process 🔨
Here’s what we tackled together:
- Cutting the cabinet — Measuring twice, cutting once (and learning from the one time we didn’t)
- Mounting the TV — Ensuring perfect alignment for that arcade feel
- Wiring the controls — Connecting each button to the Zero Delay encoder
- Configuring Batocera — Loading ROMs and mapping controllers
- Cable management — Because even arcades need good hygiene
- Final assembly — Watching it all come together
The whole project took us a few weekends. Some moments were messy. Some were frustrating. All of them were worth it.
Build Gallery 📸
The Real Win ❤️
The best part wasn’t finally seeing the “Insert Coin” screen light up.
It was the “love of the build.”
It was watching my son’s face light up when he realized he could build a real machine with his own two hands. When he understood that things don’t just come from stores — they come from ideas, effort, and persistence.
We didn’t just build an arcade cabinet. We built:
- A bridge between generations
- A lesson in problem-solving
- A reason to spend quality time together
- A centerpiece for future family game nights
Customization of Audio 🎵
Audio Customization 🎵
I’ve linked my cabinet to Alexa, so when I say:
“Alexa, turn on cabinet”
…it starts automatically.
To customize the startup audio using my favorite movie theme — Back to the Future (BTTF) — I downloaded two audio tracks:
coin.mp3bttf-track.mp3
I then moved both MP3 files into:
/userdata/music/boot/
The goal is to:
- Play the coin sound
- Play the Back to the Future soundtrack for a few seconds
- Fade out the music smoothly
- Continue booting Batocera
🎚 Create a New custom.sh File
Create the following file in Batocera:
/userdata/system/custom.sh
🧑💻 Add the Following Content
#!/bin/bash

MUSIC_DIR="/userdata/music/boot"
COIN_SOUND="$MUSIC_DIR/coin.mp3"
SELECTED_TRACK="bttf-track.mp3"

PLAY_SECONDS=25
FADE_SECONDS=5

TRACK="$MUSIC_DIR/$SELECTED_TRACK"

# Play coin sound
if [ -f "$COIN_SOUND" ]; then
    mpv --no-video --really-quiet "$COIN_SOUND"
fi

sleep 0.5

# Play soundtrack with fade out
if [ -f "$TRACK" ]; then
    mpv --no-video --really-quiet \
        --length=$PLAY_SECONDS \
        --af=afade=t=out:st=$((PLAY_SECONDS - FADE_SECONDS)):d=$FADE_SECONDS \
        "$TRACK"
fi

exit 0
🔒 Make the Script Executable
chmod +x /userdata/system/custom.sh
What We Learned 📚
For other parents considering a similar project:
- Start with the end in mind — Pick a design that fits your space and skills
- Let your kid lead — Even if it means mistakes, they learn more that way
- Repurpose before buying — You’d be surprised what you already own
- Embrace the chaos — Projects like this get messy. That’s part of the fun.
- Document the journey — Take photos. Your future self will thank you.
Now If You Need Us…
We’ll be busy fighting Frieza and trying to get back to 1985 before the clock tower strikes!
🎮 Want to Build Your Own?
Here are the resources that inspired us:
- Holbrook Tech Arcade Plans — The design that started it all
- Batocera Linux — The retro gaming OS that powers our cabinet
- Sanwa Controls — Premium joysticks and buttons
Grande Giove
Have you ever built something meaningful with your kids? Drop a comment — I’d love to hear your story. 🛠️

Use the share button below if you liked it.
It makes me smile, when I see it.